Contents
Have you ever found yourself in a frustrating cycle of sending comments and revisions to your manufacturer, only to receive prototypes that still don't meet your expectations?
That situation is frustrating, especially if that happens often.
As a professional in the apparel industry, you know that the development process is frequently on a tight schedule. These fast-paced conditions require effective tech packs to ensure deadlines and products are delivered on time. Delays at this stage significantly affect your business and career as a fashion designer or product developer.
Writing effective garment assembly sheets simplifies the prototyping process and reduces the need for revisions.
In this article, we'll explore techniques to get well-sewn prototypes -from the beginning!- That way, you will need fewer rectifications and require fewer samples. You'll have more time to focus on critical tasks like improving the fit. And ultimately, you'll notice significant professional growth -and more opportunities- due to the positive results of your work.
Garment Assembly and Tech Packs: How to explain constructions and finishes
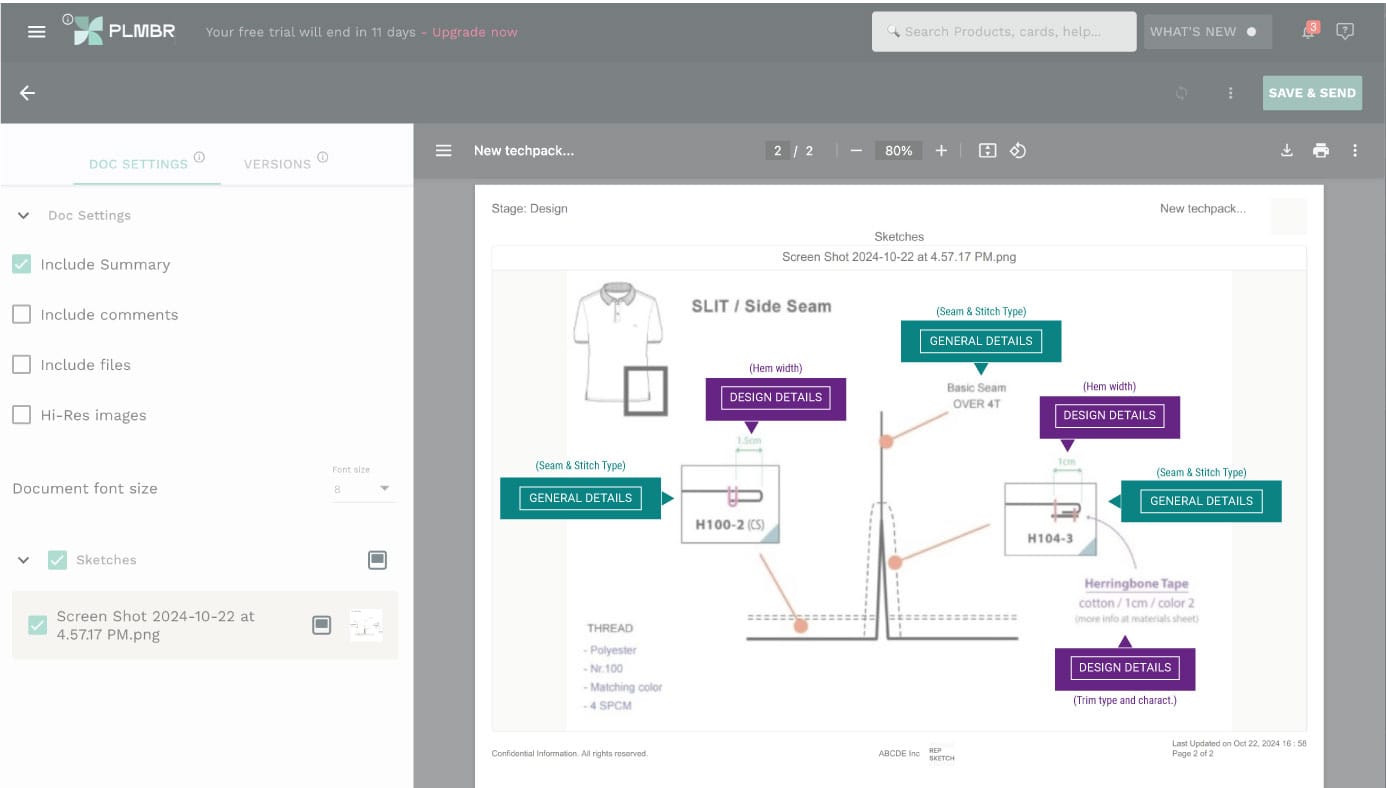
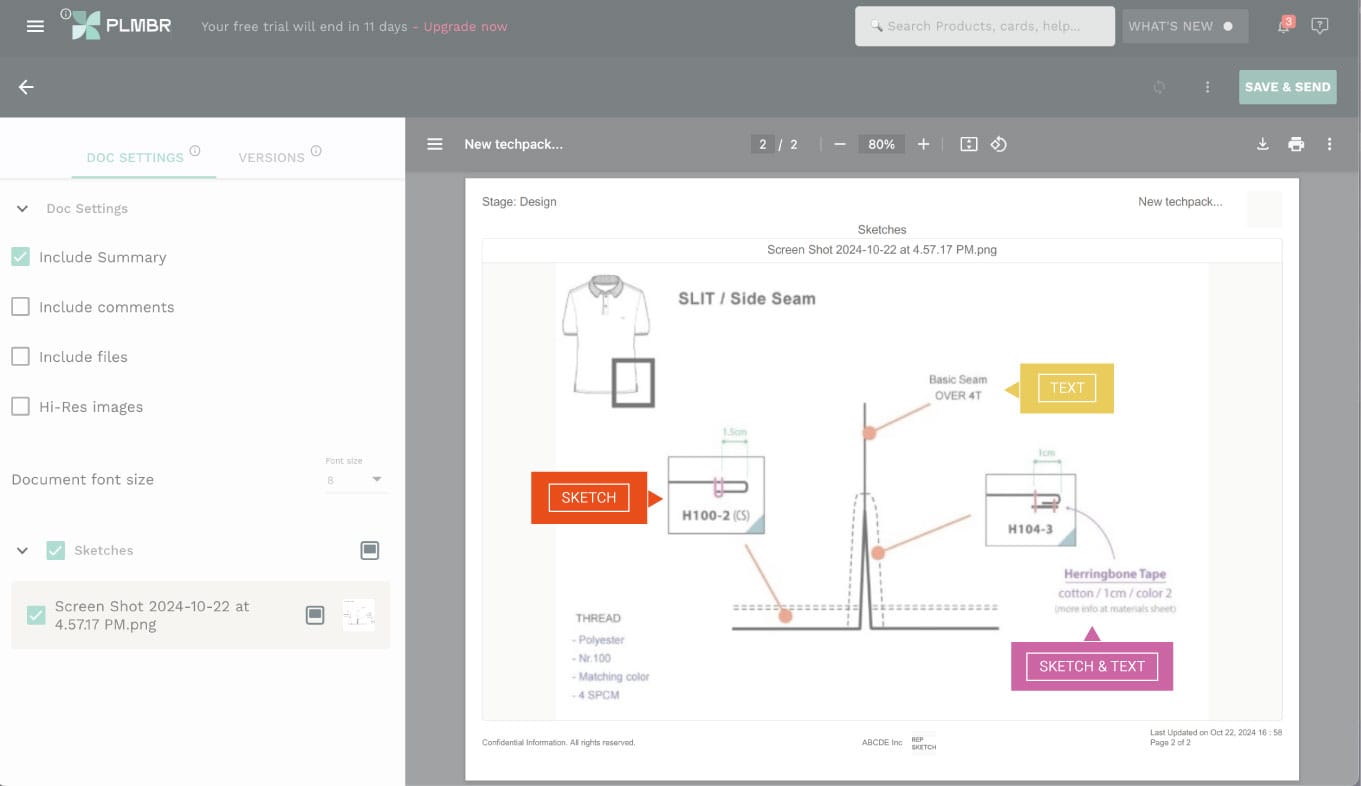
The first step to receiving an accurate prototype is being crystal-clear and specific about what you want. So, when explaining garment constructions, we will add essential information such as the type of seam and stitch (see below "General Details") and, in some cases, specific information that needs more details, like the width of a hem (see below "Design Details").
Avoid unnecessary prototype rectifications by being clear and specific from the beginning of the development process.
General Details:
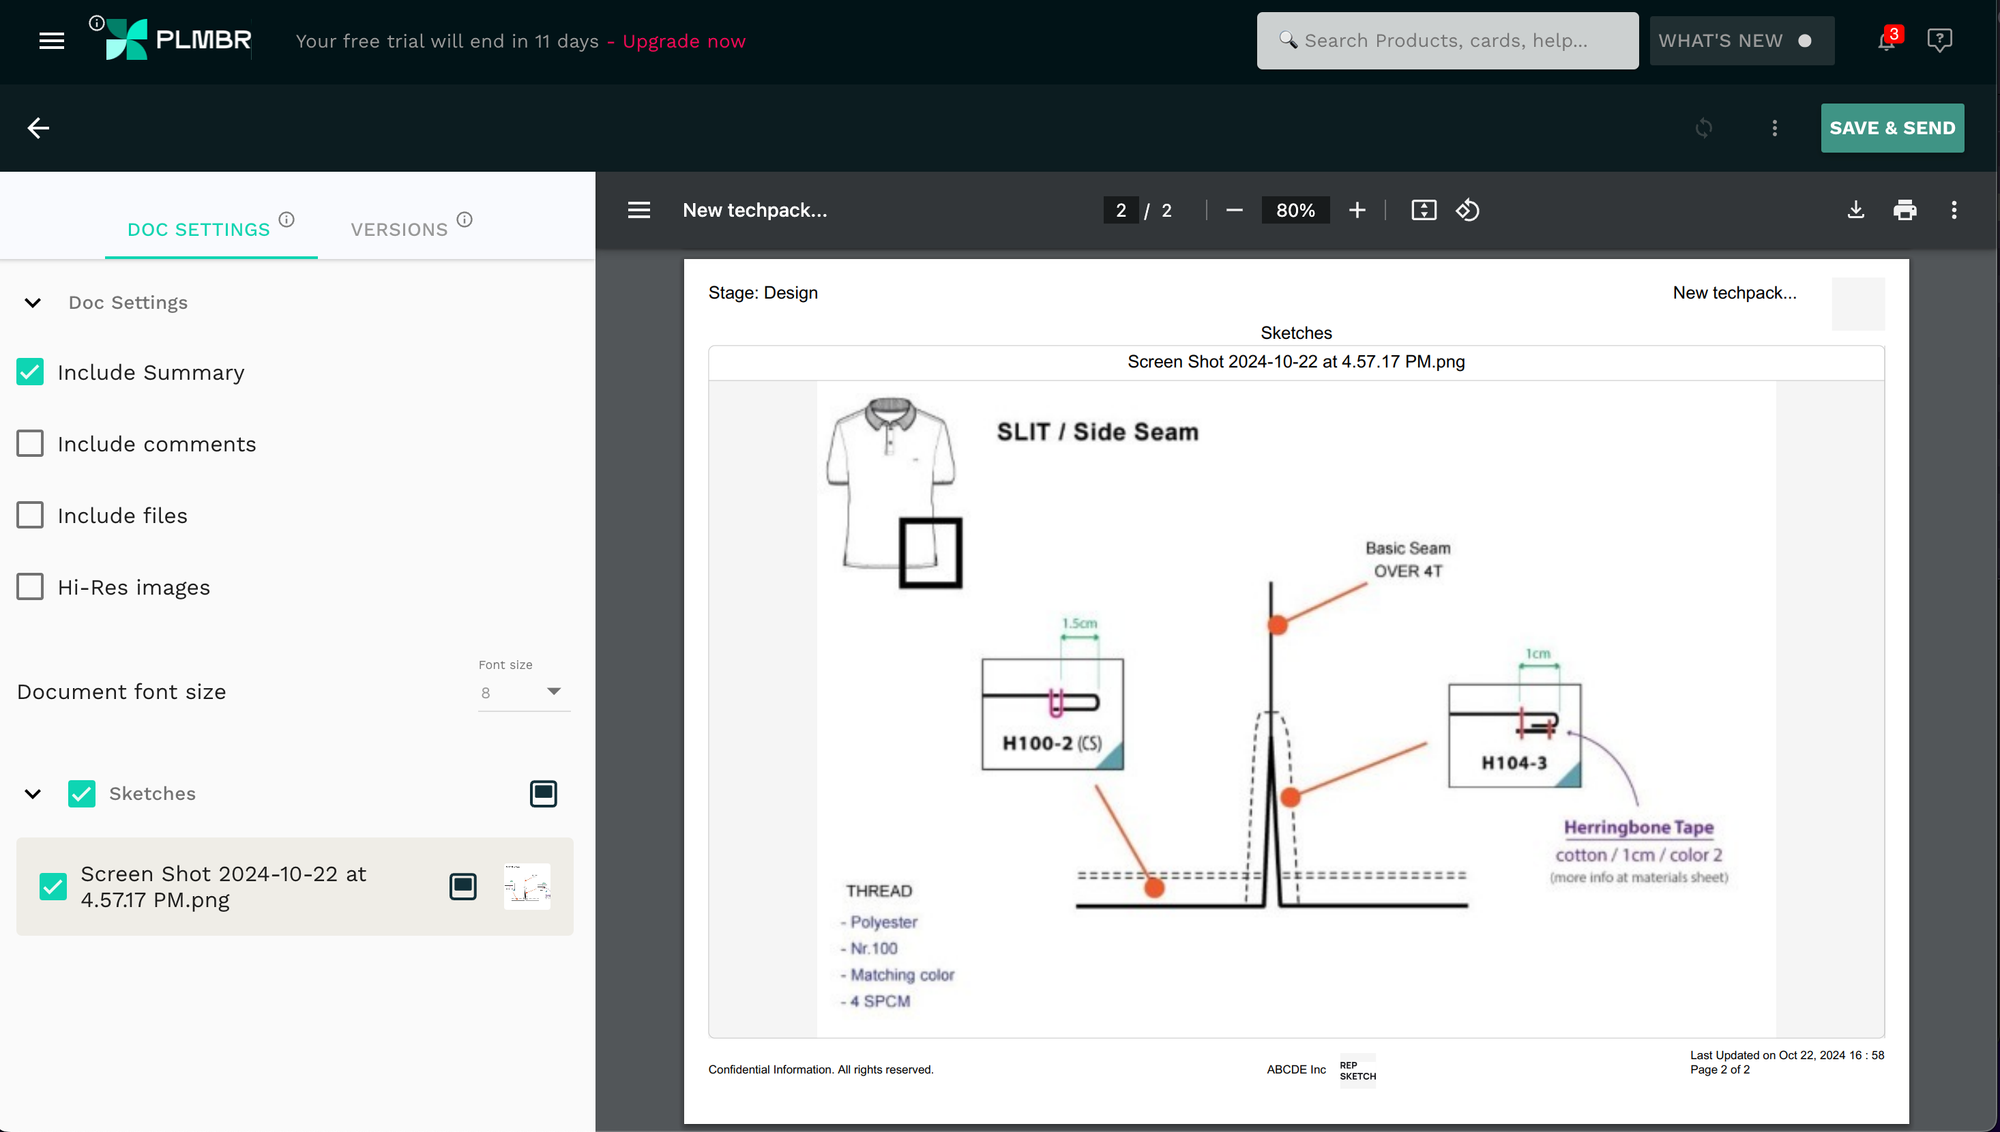
1. Stitch type: especially when the manufacturer can not see it in the flat sketches, like serged edges
2. Topstitch type: they must be correctly drafted and located in the flat drawing.
3. Seam structure: some constructions are so standard that we don't even mention it. For example, we all assume the side seam of a t-shirt is a Basic Seam made by an Overlock 4T.
Design Details:
1. Measurements, like specifying the width of a hem or placket
2. Additional materials, like tapes and bindings (trims).
Now, to specify any construction and finishing, we use some of these three elements:
1. Text
2. Sketches and illustrations
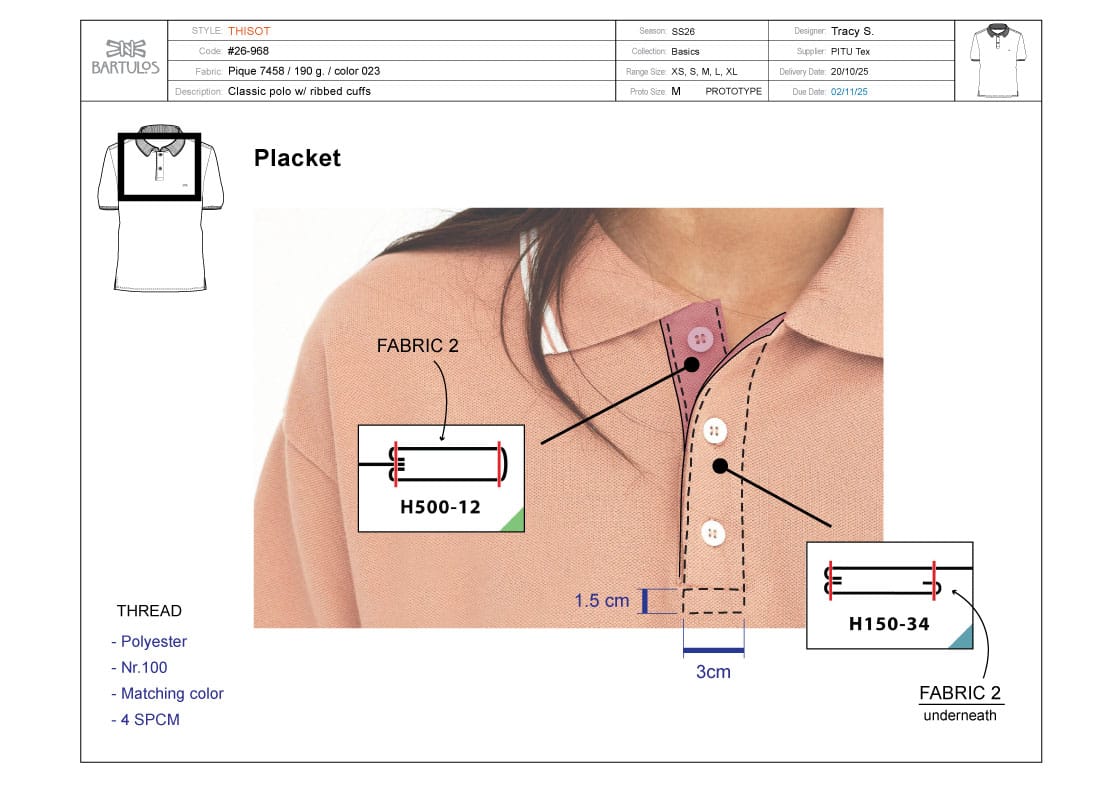
3. Pictures
We'll mostly use text and sketches.
Sometimes, we'll use them together, complementing each other, or separately for simpler constructions and finishes.
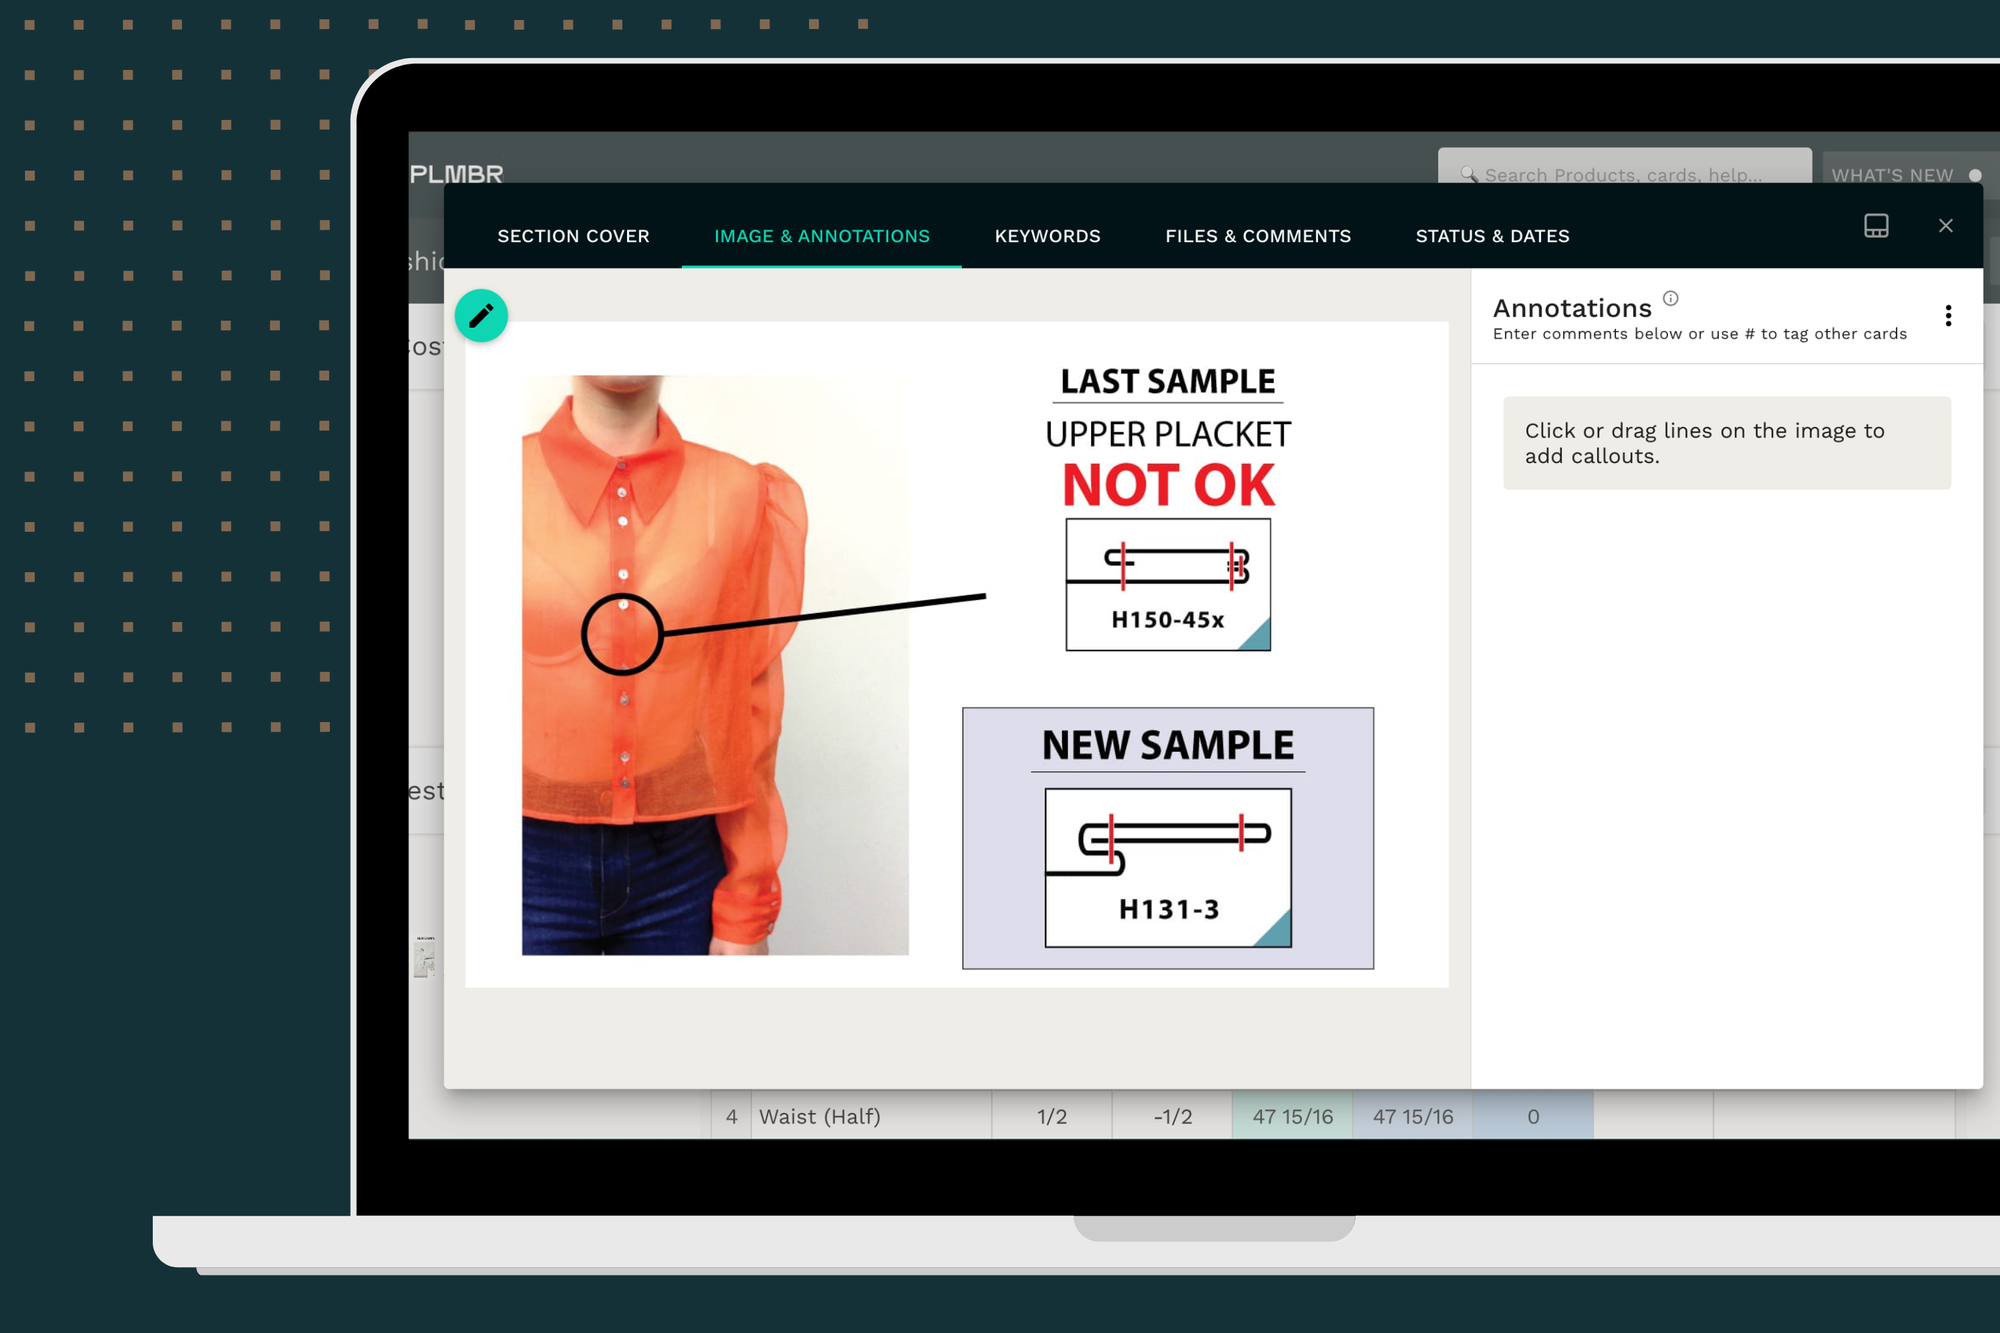
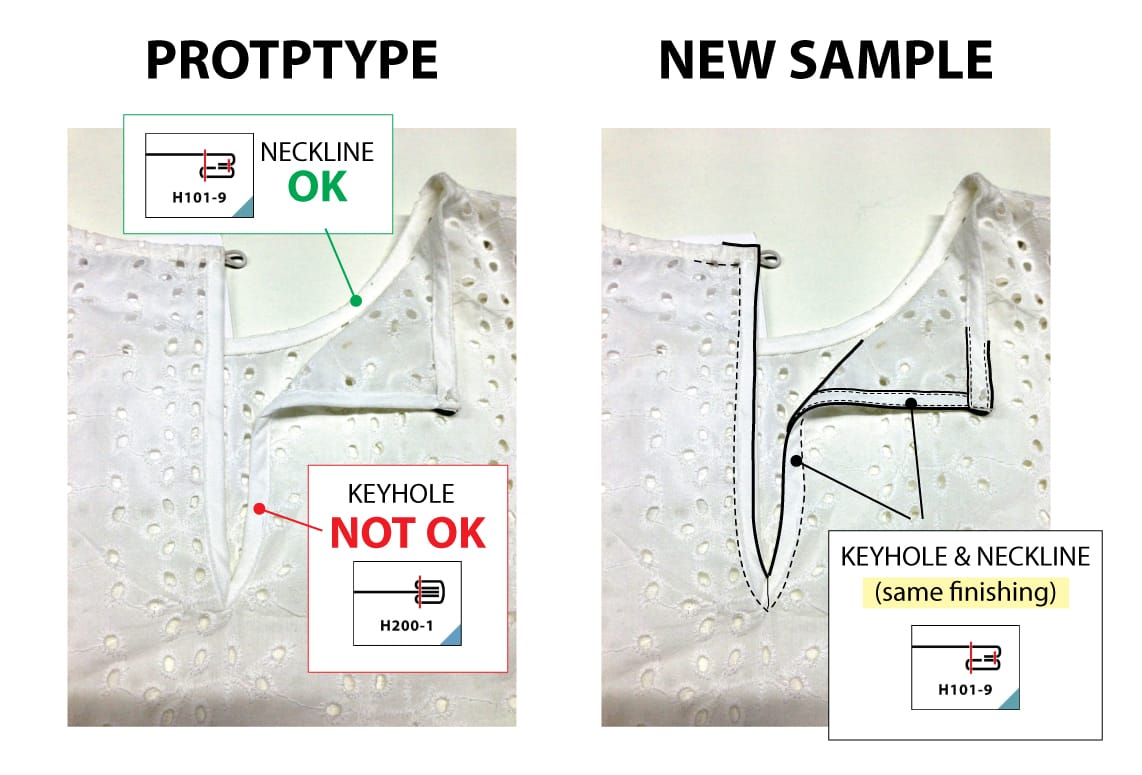
Pictures are an excellent resource for clarifying the most complex details that need a deeper understanding. The problem is that we don't always have the right image available. However, combining these three elements allows us to make some pictures work well.
Summary:
1. The purpose of explaining the construction and finishes of a garment is to save time and get better results.
2. To do that, we want to reduce the fitting comments and require fewer prototypes.
3. To do that, the manufacturer must understand our design perfectly at the beginning of the development process -when we require the first prototype.
4. We do that by explaining extremely clearly what we want.
5. We explain what we want by indicating each seam's basic and specific information.
6. We explain each seam's basic and specific information using texts, sketches, and pictures.

