Contents
One of the critical things a designer must strive for is accuracy. The foundation of this lies in the creation of their tech packs, and they must include all the information necessary for a product design idea to become a reality. Tech packs are filled with technical sketches, which provide a tangible image of what a garment may look like. However, the key to a truly accurate tech pack are the arrow callout comments a.k.a annotations, tagged with those technical sketches.
These arrow callouts usually point to specific details on the sketches, with comments to further explain them. This helps manufacturers to clearly understand the design requirements and make products to exact specifications.
In this blog post we will discuss why arrow callouts are an important part of every tech pack. We will also point out the main limitations every designer faces when adding annotations to technical sketches in Excel and Adobe Illustrator. And, finally, we will provide a solution on how to spec a garment fast and how to avoid crucial mistakes along the way.
What are arrow callouts?
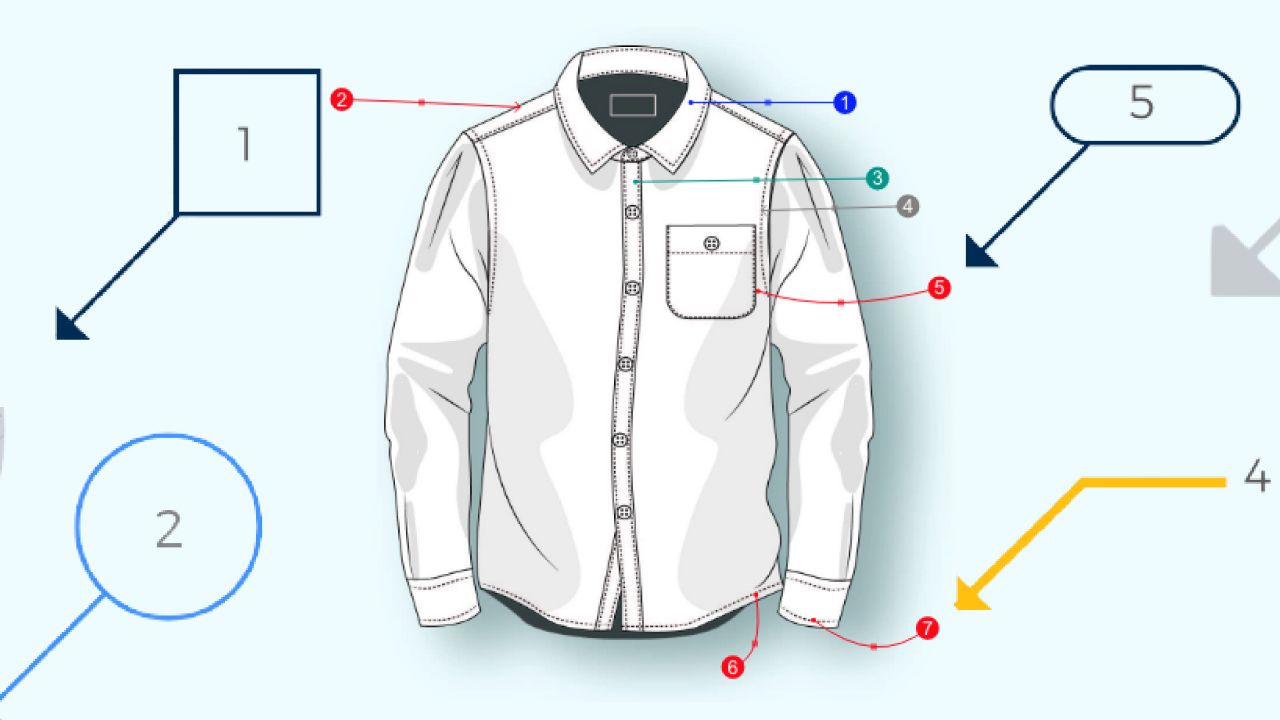
Arrow callouts or callout comments are additional pieces of information that are attached to technical sketches. Some designers also call them comment annotations. These technical annotations are a note of explanation or a comment about a specific detail of a technical sketch. For example, elastic/buttons placement or specific construction detail. Details like these are shown clearly in the image alone if needed, so it always helps to include additional details.
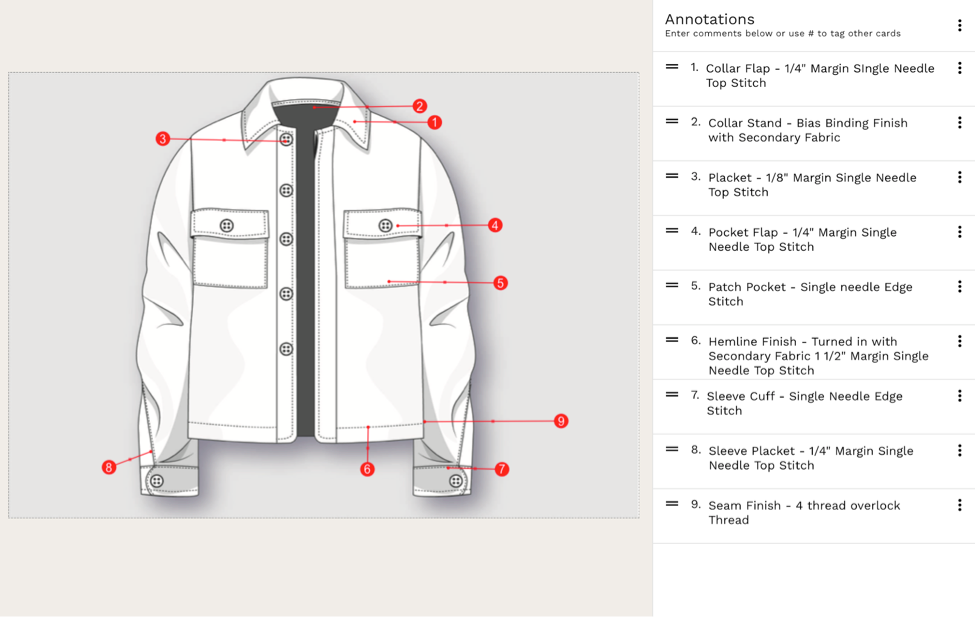
Arrow callouts are usually added in Adobe Illustrator along with the technical sketch. They are also sometimes added in Excel. These callouts are typically drawn as red arrows with corresponding numbers or letters. Sometimes they are drawn simply as lines without the pointing arrows.
Why are arrow callouts important
Imagine a technical sketch as a blueprint of your garment. You’d want to specify every little detail in order to manufacture it the right way. To make sure the trims are placed in the right place, the collar and cuffs are interfaced and the desired fit is achieved.
Here, the arrow callouts come into play. Without these callouts, important information can go missing and your garment may not look the way you intended it to. This results in multiple rounds of approvals and additional physical garment samples. This wastes a great deal of time and, sometimes, money.
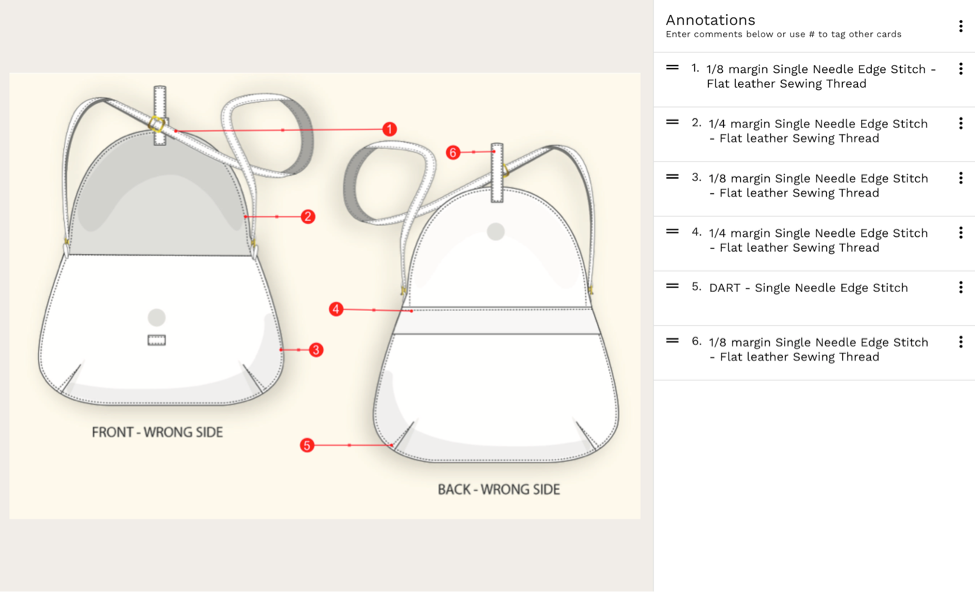
To illustrate the importance of arrow callouts take a look at our handbag example. We added arrow callouts to the front and back views of the handbag.These callouts include ring placement, tri glider and the sewing thread placement. This shows how callouts make our technical sketches more precise.
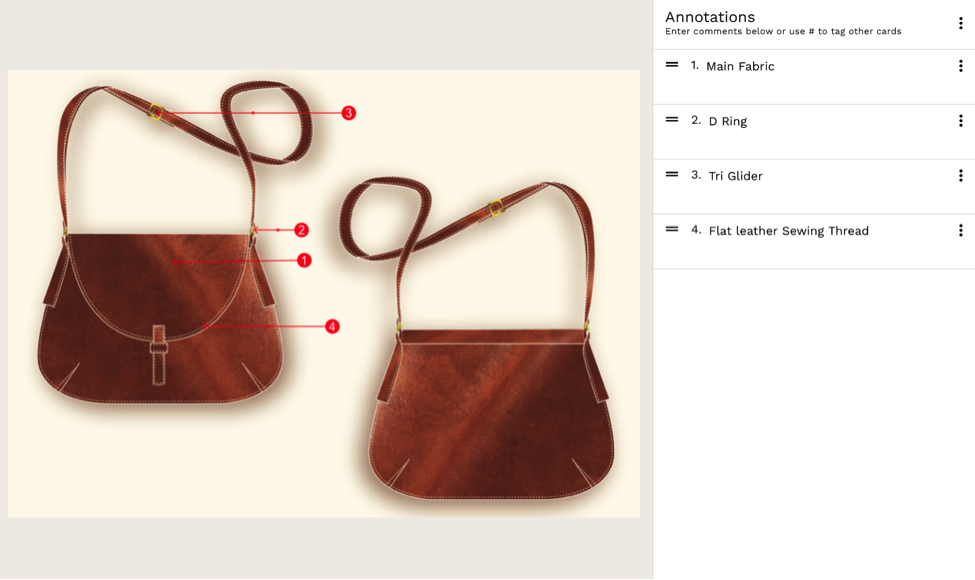
To provide the specifications on how the handbag should look inside we provide additional technical sketches with callouts of the turned in front and back views. Using the callout annotations we specify details like edge stitching, sewing thread, position of the dart, etc.
Limitations of Excel and Adobe Illustrator when drawing annotations
Adobe Illustrator, Excel and CorelDRAW are all popular software options for designers. However, they can be extremely limited when it comes to adding callout comments to your work. As vector-creating software programmes, it can be difficult to add precise wording and signposting to your work.
Adding lines and labels, particularly on programmes that are not word-based like Illustrator, can be extremely difficult and time consuming. If you make a mistake it can also be impossible to rectify it quickly. It also runs the risk that you may accidentally move another callout line by mistake. Thus, other software programs - whilst great for drawing technical sketches - are not designed to allow you to add callout comments with ease.
To demonstrate, let me show you how this would works in Illustrator step-by-step
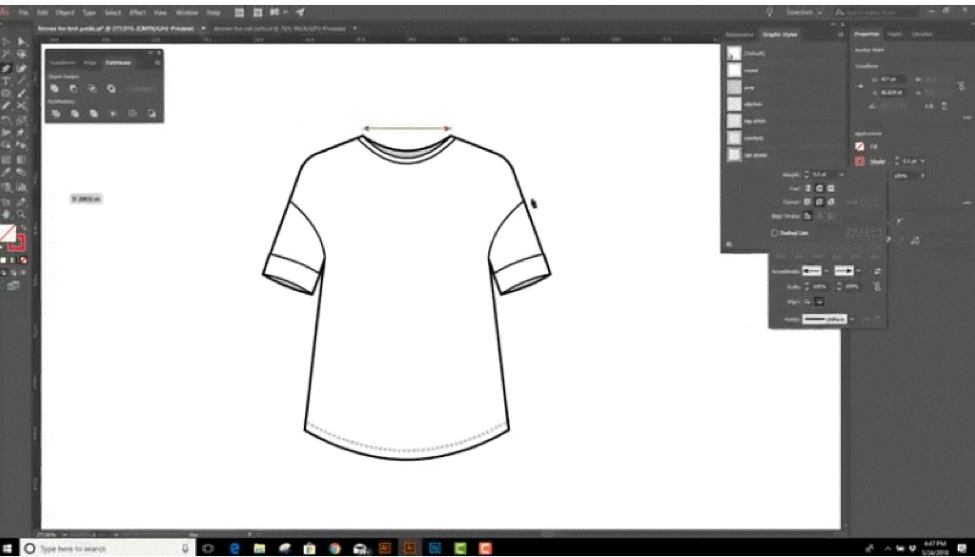
To add arrow callouts in Adobe Illustrator you would need to:
- First lock the layer with your sketch;
- Create a new layer for your callouts;
- Draw a line to every detail that you’d like to specify;
- Edit it to look like arrows;
- Create a textbox, add design details and edit the textbox to fit
This leads to a lot of boring work and wasted time.
How to add callout annotations on Techpacker
Now: here’s the solution.
Techpacker allows you to add annotations simply by clicking on it. Click and drag on the part of your sketch where you want the call-out line to be. This is drawn, initially, as a flat line annotation. Drag this line for as long as you like and then a box will appear on the right-hand side. The callout field on the right will let you add your comment.
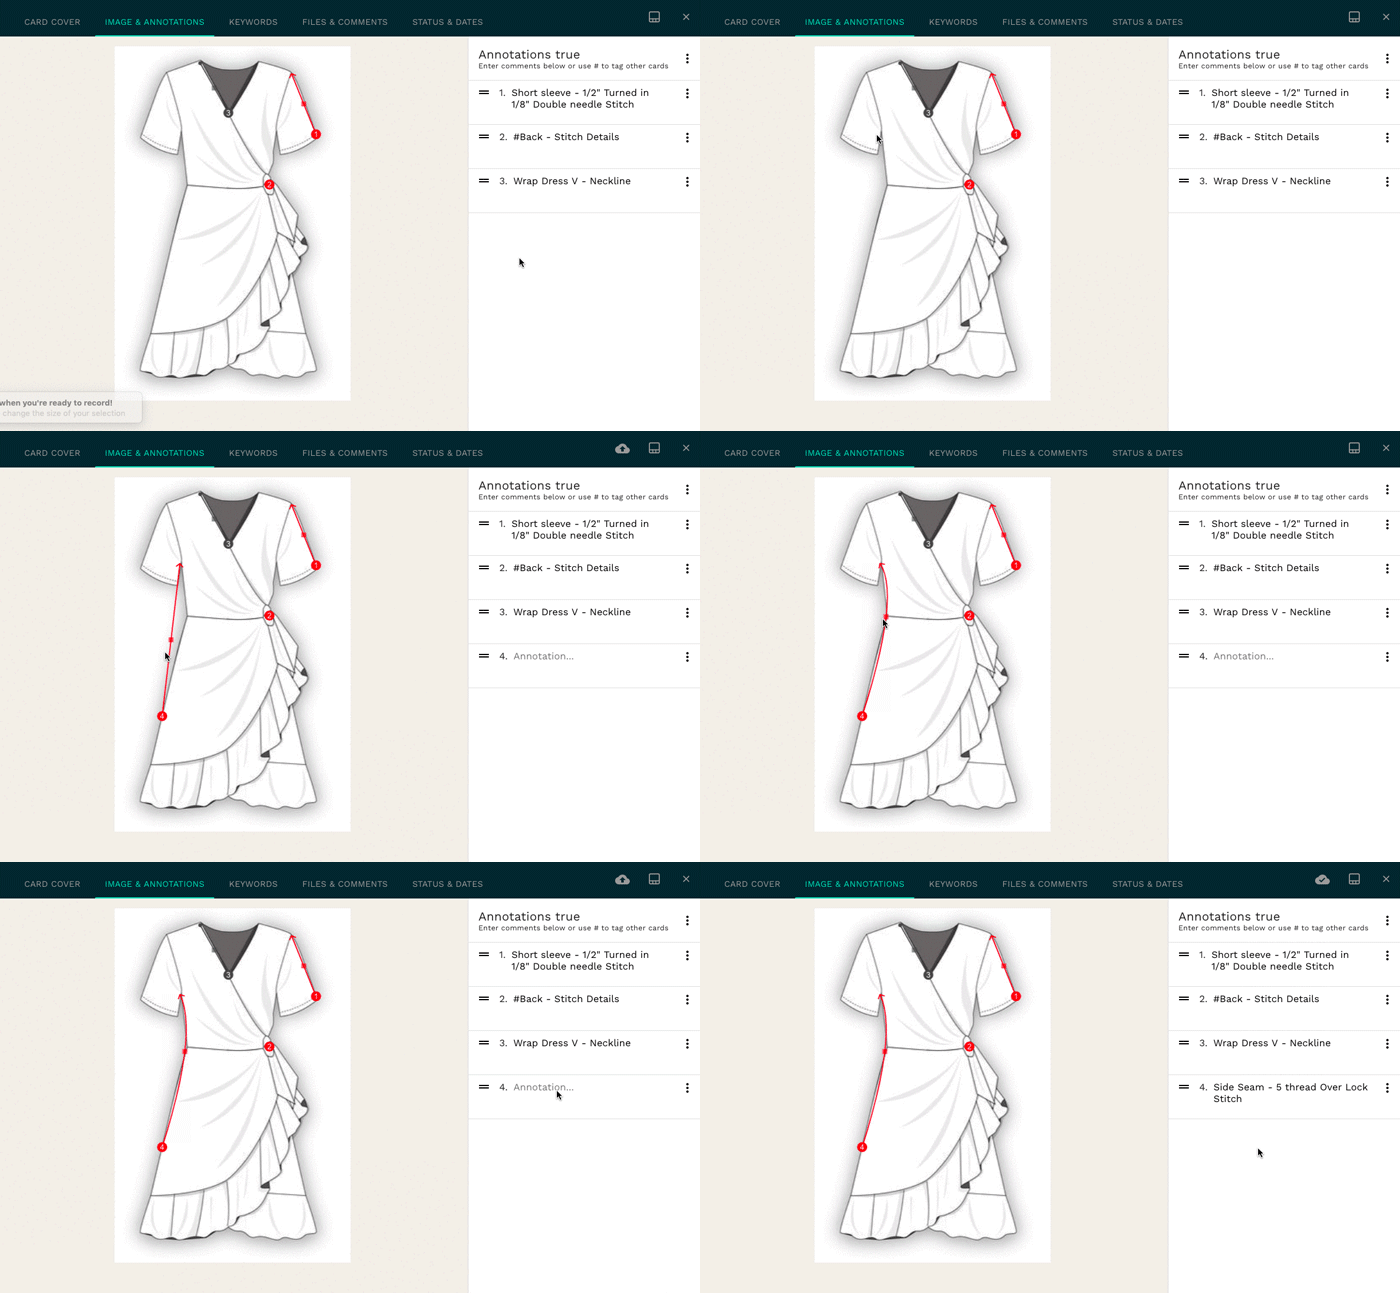
You can also use our Adobe Illustrator plug-in to directly upload an image from Illustrator - this will allow you to add your callout comments on Techpacker with no fuss.
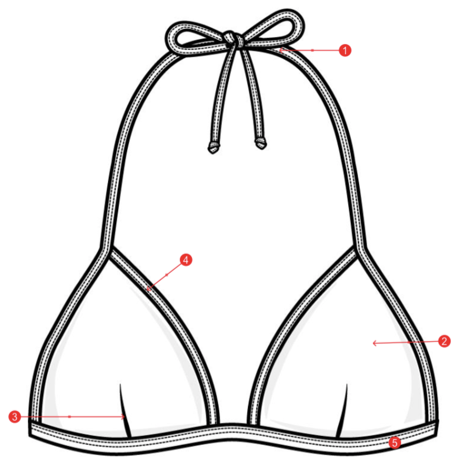
Techpacker also allows you to create curved annotations in one click when needed. For example for garment’s parts like shoulders or bra cup curves it’s especially helpful.
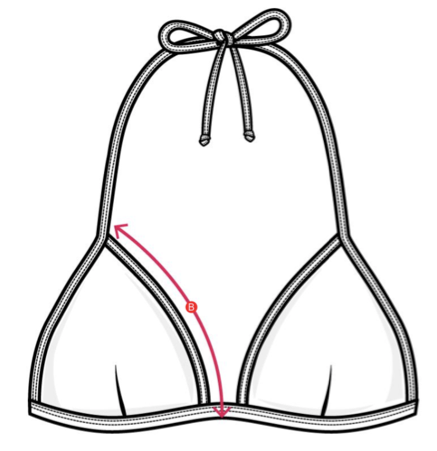
Techpacker saves your annotations so when you replace a sketch, you won’t lose your annotations and your hard work won’t go to waste. This is also where you can delete the image if necessary.
The best part is that Techpacker automates a lot of processes for you. The platform makes it easy to offset annotations, change colors and set them in specific order to make your technical sketches clearer for your manufacturer to read. You can also re-order your annotations simply by dragging them if needed. This feature isn’t available in many other programs - like Illustrator - which makes it especially helpful.
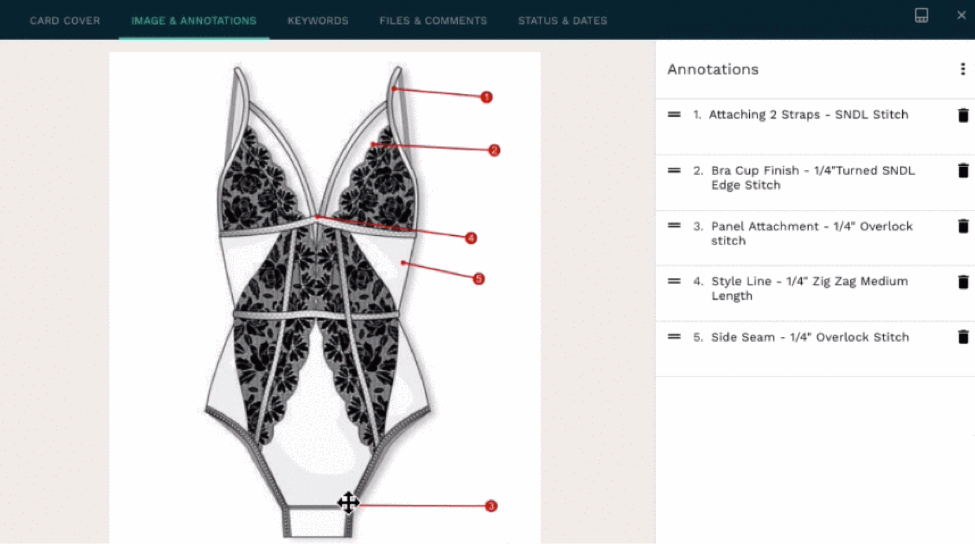
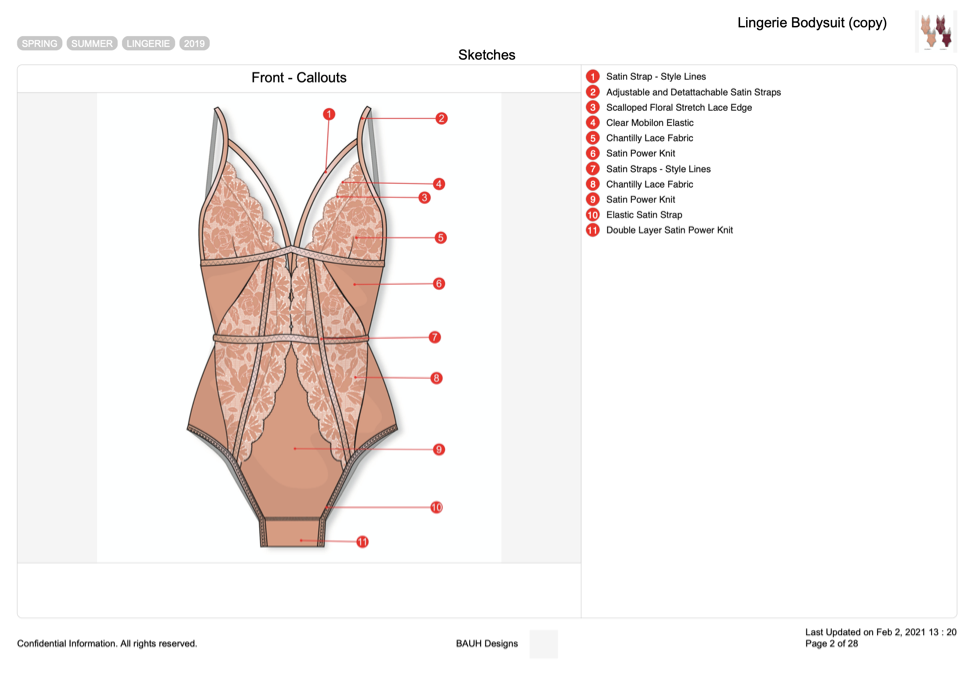
Once the annotations are added to the technical sketches, the full factory ready tech pack can be generated in one click. With all of your comments included in the correct order.
|
Interested in trying out this callouts feature? OR Request a demo
Manage your product development to production workflow with factories hastlefree. Try Techpacker. |


