
Contents
In this guide, we will discuss what a flat pattern is and how to make them. We’ll show you how to create a basic flat pattern and explain the important parts of the process.
What is a Flat Pattern?
A flat pattern is like a blueprint for cutting your fabric. It translates the flat, 2-dimensional fabric, to fit around a 3-dimensional body while allowing for both the proper aesthetic fit as well as the proper fit for the comfort and range of motion for the wearer.
Flat patterns can be drafted “from scratch” or by starting with a basic pattern and manipulating it to look how you want. We’ll discuss pattern manipulations in a separate article, but in this post we will draft from scratch.
🖇 FREE EBOOK
How To Master Apparel Sizing and Measuring
Learn to figure out 📏📏 sizing and measuring right for your fashion products.
What Do We Need to Start Drafting?
In order to start out flat pattern creation, we need to have a few things:
- Body measurements for the size we are creating
- A sketch or photo of the garment you are patterning
- A reference guide for common pattern angles and measurements
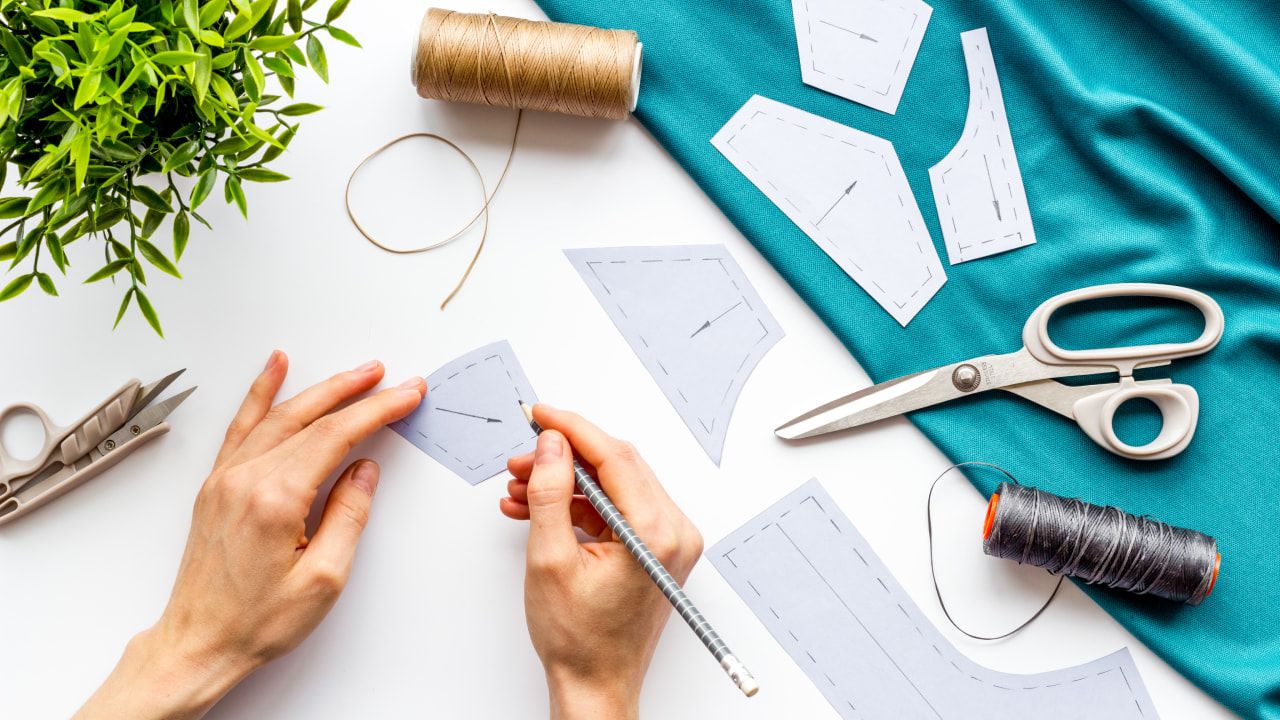
If you are drafting your pattern on paper, you will also need:
- Pattern Paper
- A pencil
- A French curve
- A straight ruler
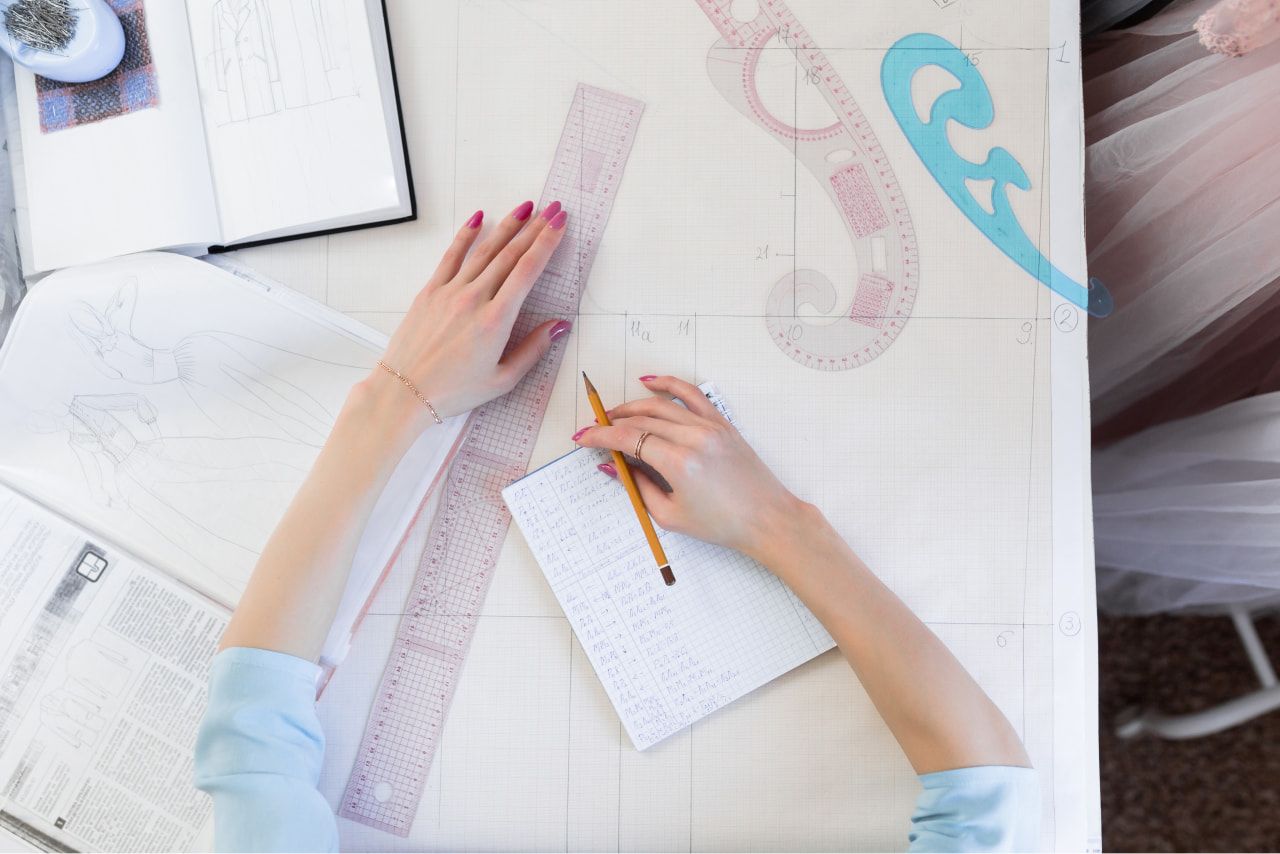
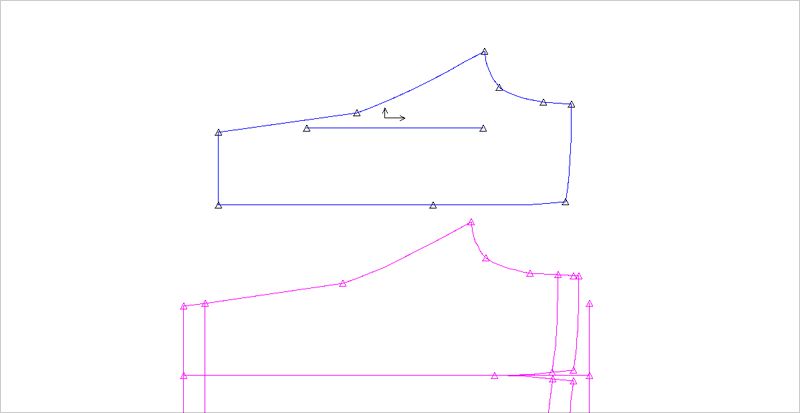
Or, you can draft on the computer using a CAD program. We used Gerber Accumark, so that is what you will see reference in some of the images, but other common programs are Optitex and Lectra.
Depending on how and why you’re creating a pattern, and if you’re doing so for yourself, a small business, or a larger corporation, you will have a different reference for what your style looks like. This could be a reference image of an existing garment, the reference garment itself, a stylized sketch, or a tech pack complete with technical drawings.

We will be using a tech pack, with a technical sketch, for this simple sweatpant with an elasticated waistband and leg cuffs.
For our purposes, we will be using the following body measurement chart. (ASTM standard body measurements from Patternmaking for Fashion Design, 4th Edition. Helen Joseph-Armstrong)
| Point of measurements | Measurements (in inches) |
|---|---|
| Waist | 27 ½” |
| High Hip | 36” |
| Full Hip | 39” |
| CF Crotch Depth | 10 ¼” |
| CF Hip Depth | 9 ½” |
| Side Hip Depth | 9” |
| Waist to Ankle | 38 ½” |
| Total Rise | 26 ¾” |
| Waist to Knee | 23 3/8” |
| Thigh | 22” |
| Knee | 14 ½” |
| Ankle | 10 ¼” |
When drafting patterns, you will typically be working sideways, as this is representative of the way that the pattern will lay on the fabric later on.
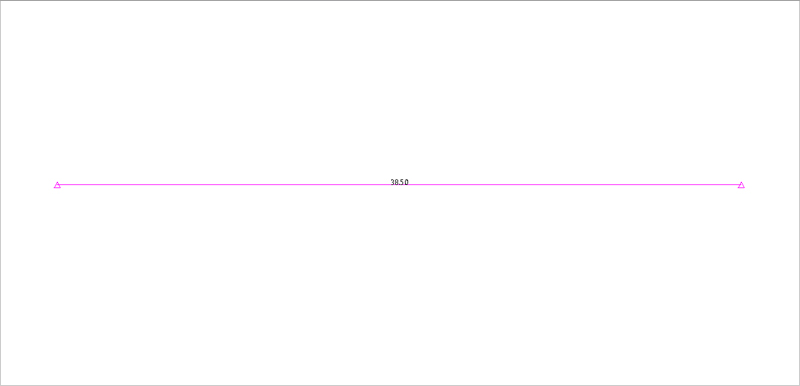
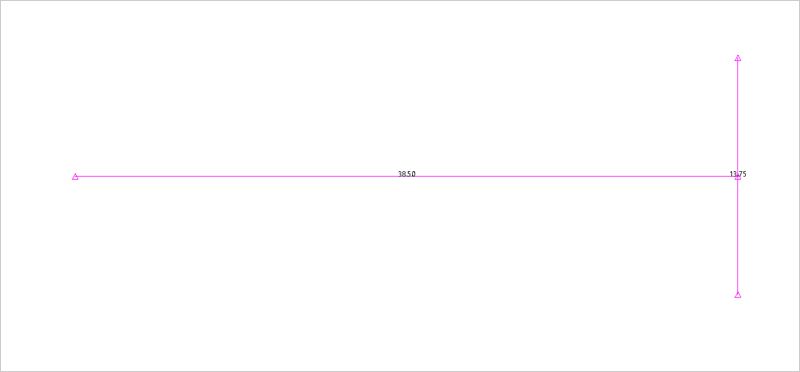
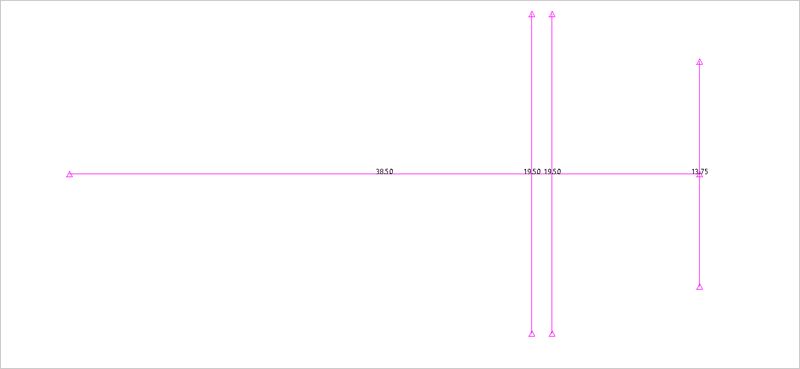
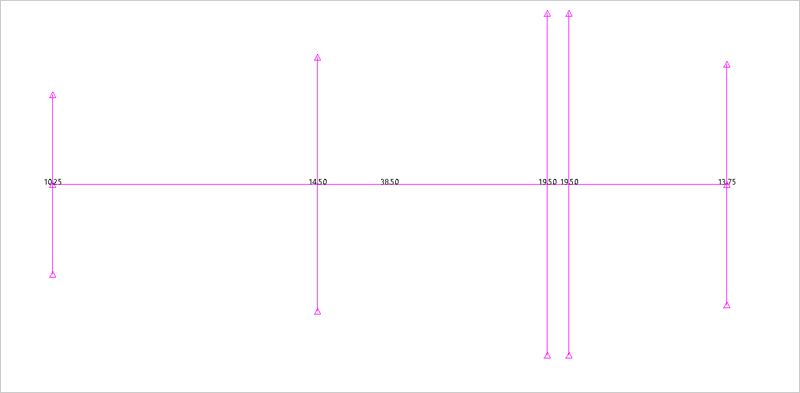
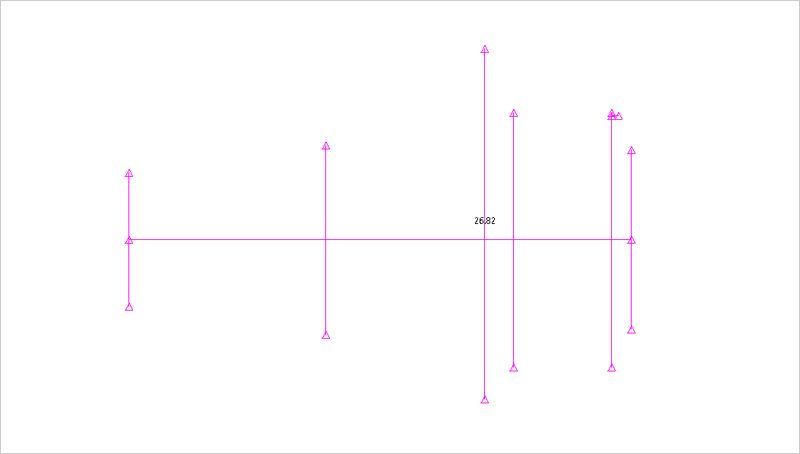
To start with, we will draw some baselines. The first will be our side baseline. This will be equal to our waist to ankle measurement of 38 ½” and you will draw this line horizontally on your screen or paper.
Next, we will at our waist baseline at the top of our side baseline. The full waist circumference in 27 ½”, but we are currently working only on half of the body, so we need a waist baseline of 13 ¾” and we will center this on our side baseline.
At the CF, we have a hip depth of 9”, so we will draw our hip baseline 9” below our waist, again this should be half of the body measurement and centered on the side baseline. We will also add our crotch baseline at 10 ¼” below the waist. For now, we will keep our crotch line the same length as the hip line.
Similarly, we will add our knee baseline 23 3/8” below the waist (as indicated by our waist to knee measurement), and our ankle measurement at the bottom of our side baseline. Both of these lines will be centered on the sideline, but unlike our torso measurements, they will not be halved as they are the leg circumference.
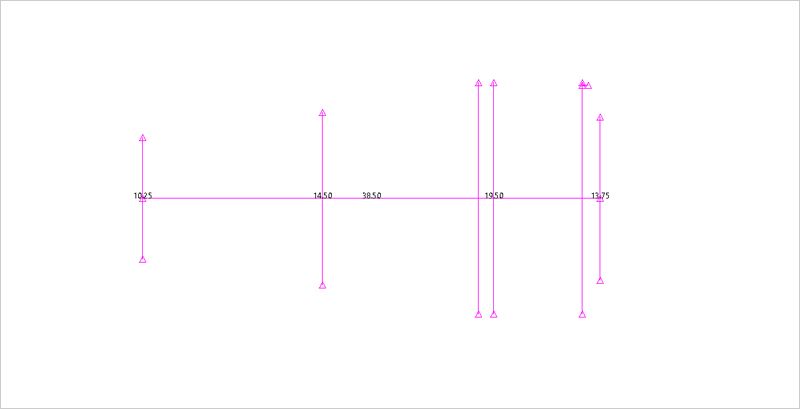
We will use these baselines as a sort of skeleton for our pattern, as they are mapping the body for us.
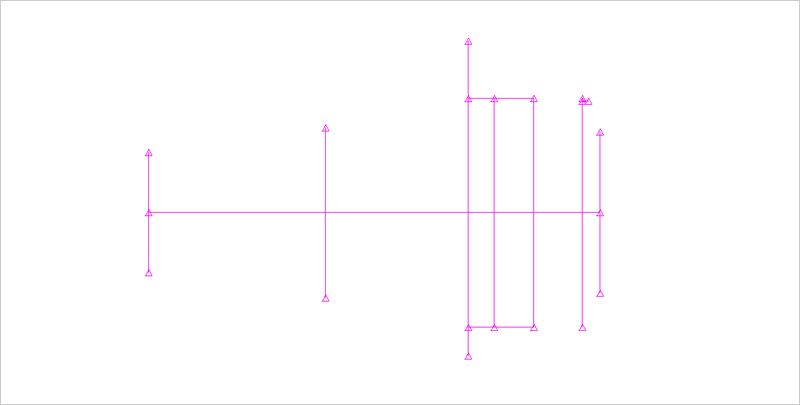
Now we need to start adding in shaping and ease to create our garment pattern. Let’s start with the rise curves. The ease amounts I will include here are based on standard ease amounts for the type of garment we’re creating and will vary based on the garment type and fit.
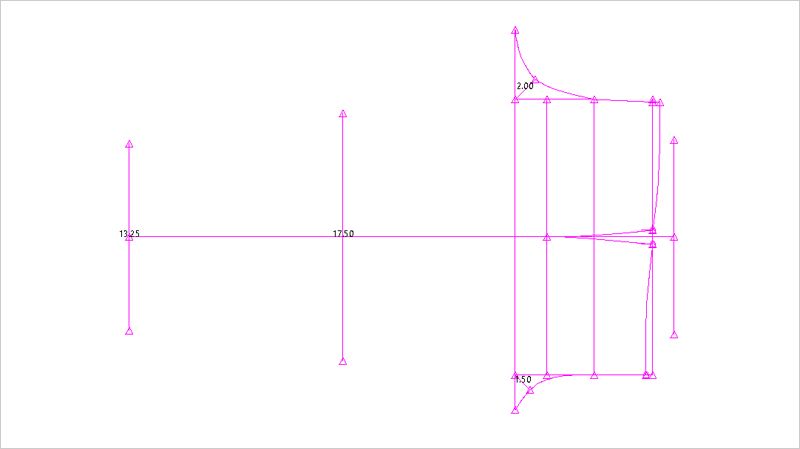
Our garment is going to sit 1.5” below the waist, so we will add a line 1.5” below our waist baseline which will be the “garment waistline” and for now, it will be the same length as our hip line, at 19.5”. We will also draw a small line that is ½” tall ¼” away from the back edge of our new garment waistline.
Now, we need to extend the back crotch, as it will be wider than the hip to create our rise curve. There is a bit of math involved here. Right now, our crotch baseline is 19.5” (equal to our half hip) with 9.75” to the front, and 9.75” to the back.
For our back crotch extension, we will take that 9.75” and extend the crotch by half that, or 4.88”. For the front crotch extension, we will extend by ¼ of the 9.75”, or 2.44”
We also need to add some ease to our crotch point so it doesn’t dig in on the wearer, so we will shift the crotch line down by 1”. If you are doing this on paper, simply draw a new line 1” lower and cross our or erase your crotch baseline.
Our crotch line is currently 11.25” below our waist baseline. We need to add a new line halfway between, at 5.63” as this will be important to creating a balanced rise. Label this new line “midline” so that you don’t get it mixed up with your hip baseline or garment waistline.
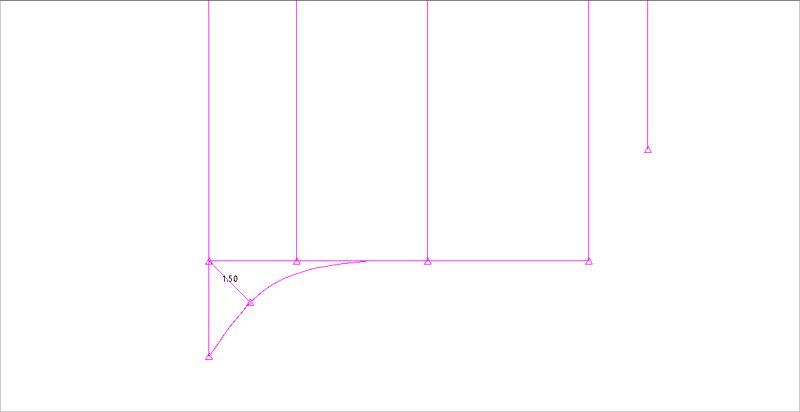
You will also draw a line straight down from each end of the midline to the crotch line, creating a box.
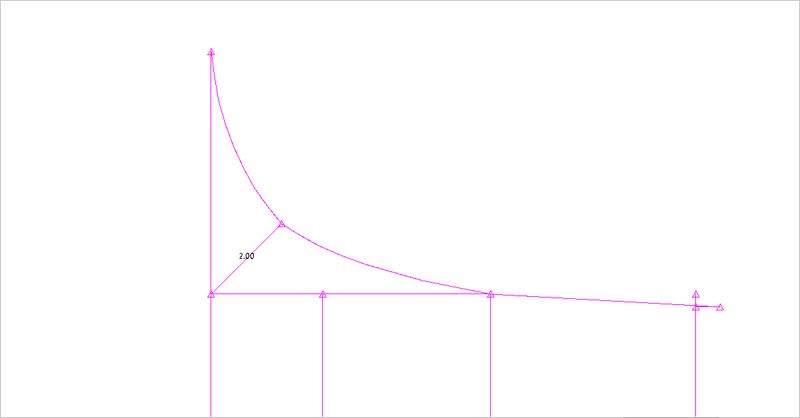
You have created right angles at the front and back now, where the crotch line and the new lines you just drew connecting the midline meet each other. At the back crotch, you will draw a 2” line at a 45 degree angle coming from this right angle and at the front, you will draw a 1.5” line at a 45 degree angle.
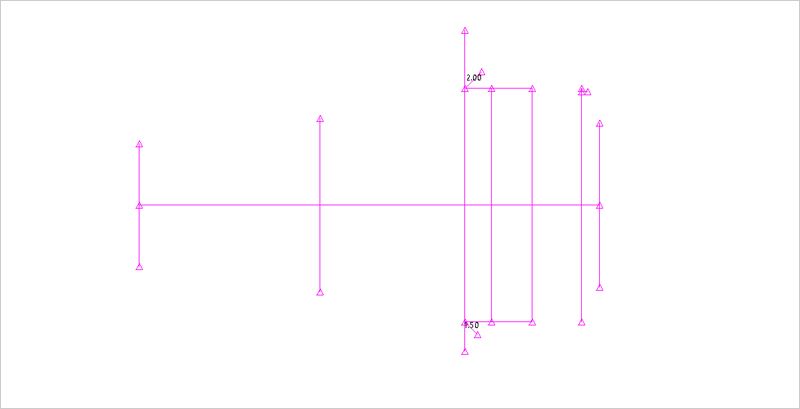
Now, we will play a bit of connect the dots to create our rise curves.
For the back rise, draw a curve from the end of the crotch extension to the end of the 2” line we just created. Then draw a curve from that line up to the end of the midline. You will then draw a straight, slightly diagonal, line connecting from there to the little back waist point we created earlier.
For the front rise, we will do the same thing, except that you will just have a straight line from the midline to the garment waistline.
Congrats! You made it through the most complex part of pant drafting – the bifurcated crotch.
Ok, let’s get the last few parts of our pattern done.
We are using a stretch fabric and want these to be a slim fit at the hip, so we will not add any wearing ease at the hip. We will be adding elastic to bring in the waist, but we want to narrow it a bit now to create a nice fit at the hip. We want our garment waist to be 2” narrower in total circumference. That means we need to take out 1” on our half body piece, and ½” each from the front and back. We will add notches ½” on either side of our side baseline on the garment waistline.
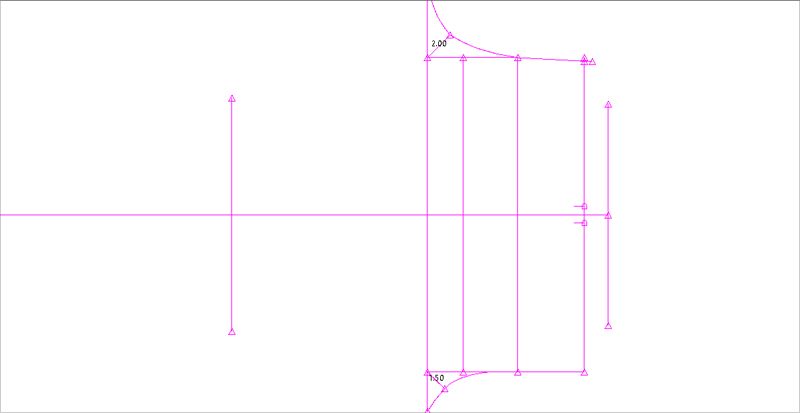
And now we will add a curved line from each of these notches to where the hip and side baselines meet. This will be your hip curve.
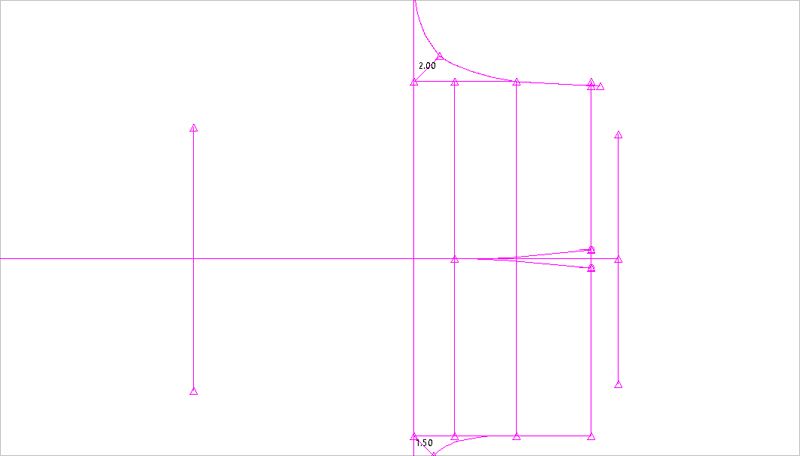
Let’s give our waistline some shape so it fits the body nicely. We will make a notch ½” below the top of the front rise. Draw a slightly curved line from that notch to the top of the front hip curve. Draw another slightly curved line from the top of the back hip curve to the top of the back rise.
Can you start to see your garment taking shape?
Even though we want very little ease at the hip, you can see in our sketch that the pants are a little looser through the legs. We’re going to add 3” of ease at the knee and ankle lines by extending each of these lines by 1.5” on each side.
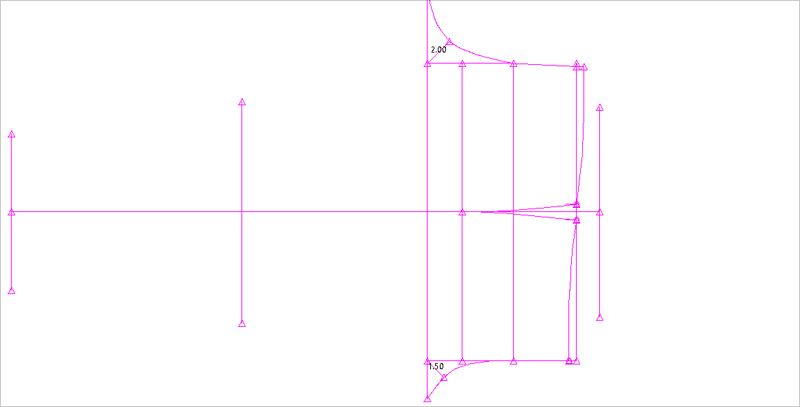
Now we will draw our front and back inseam lines by connecting the front rise to the front knee and then the front knee to the front ankle. We will repeat this at the back. To ensure that your garment sews together smoothly, you want to make sure that both the front and back crotch points create a 90 degree angle with the inseam for at least the top ½” of the line.
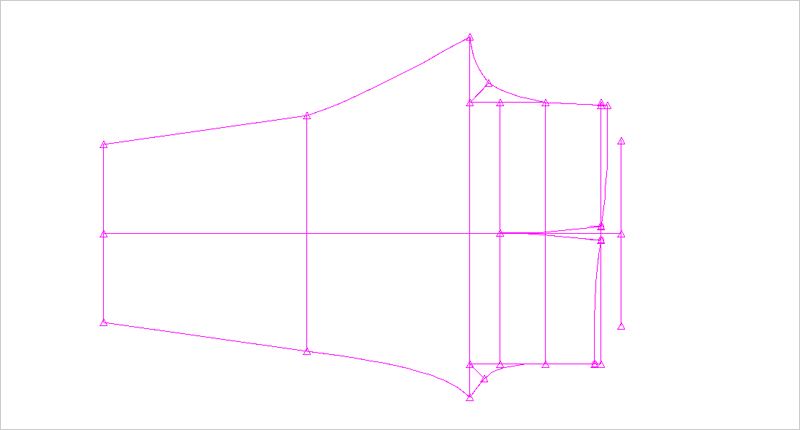
You’ll see that the top of the front inseam is a bit more curved than that back, this is to help the inseam lengths match each other, as they will be sewn together later.
Ok, so now we’re almost done!
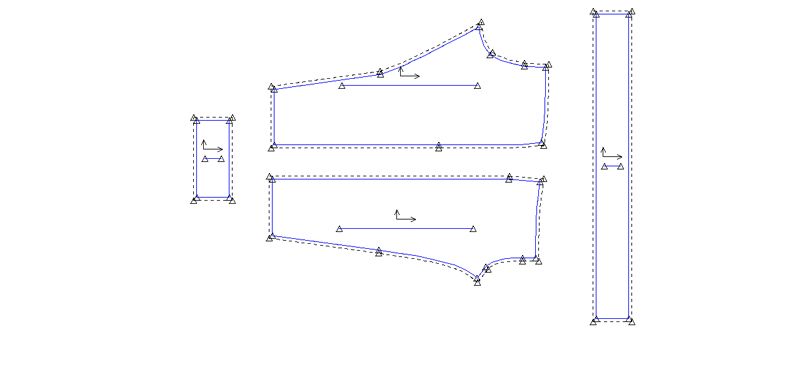
We are going to have a 2” tall waistband and 2” tall leg cuffs. So we need to draw a second waistline 2” below the existing garment waistline and new pant hem line 2” above the ankle line. These lines should be parallel with the existing lines. I’ve gone ahead and deleted a lot of my baselines in this image to make it easier to see, but yours will still have them.
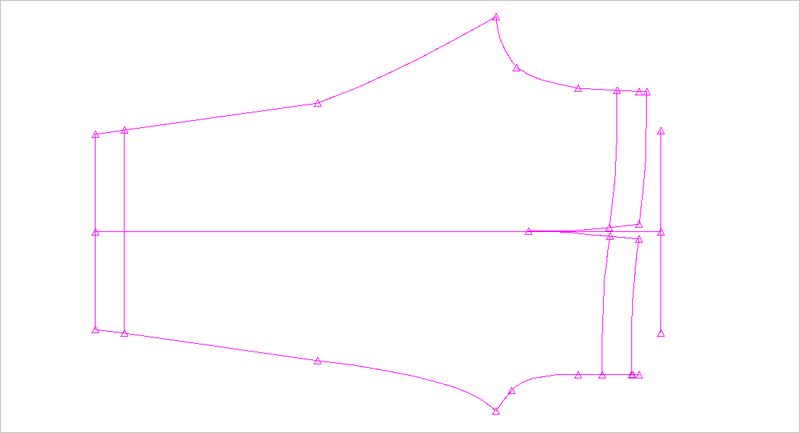
Now we will trace our front and back leg pieces to separate them. Make sure that you’re tracing using the newly added lines for the waist and hem.

Now we just need to create our leg cuffs and waistband, which will be made with simple rectangles.
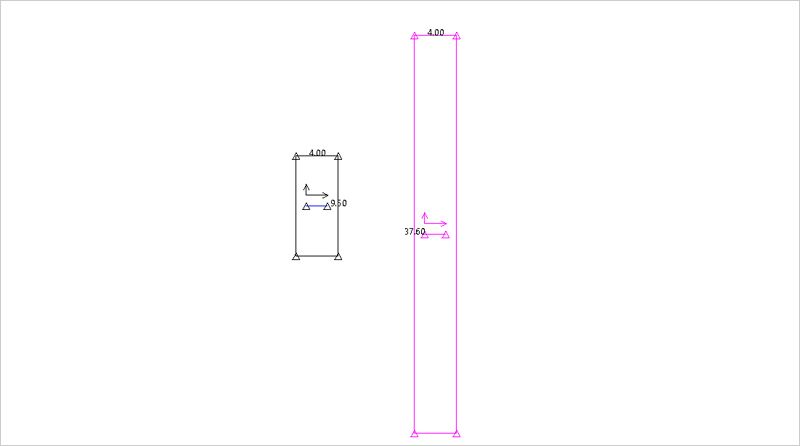
The cuffs will measure smaller than the leg opening and need to be eased in while sewing. Since we know that our body measurement for the ankle is 10 ¼” and we want the cuff to have negative ease to sit snugly, we will make our cuffs 9 ½” long. We have a 2” tall cuff, but its folded in half, so we need to make it 4” tall.
For our waistband, we will make it 1:1 with the waistline seam and use elastic to bring it in. our waistline seam on the half measures 18.8” so we need to make our waistband 37.6” long. It will also be 4” tall like our cuffs.
Now, we just need to add seam allowance. The amount may vary slightly depending on the supplier or fabric, but most times for overlocked seams the seam allowance will be 3/8” or 1cm so that’s what we will add to all pieces.
You would also want to add notches, mark the drawcord exit placement, etc. to make your pattern production ready. You can learn more about that in our Apparel Pattern Making Guide below.
 Steph Thiel
|
Ready to centralize your technical design assets? OR Manage your product development to production workflow with factories hasslefree. Try Techpacker. |